Using the AuthHub service is meant to be simple. In order to help you learn about it, I have set up a demonstration service available at https://demo.authhub.net/. The demonstration server is slightly different than a production server in the following ways:
- I have disabled password updates so everyone can use the same credentials for testing.
- Only one account is available for testing.
- The demo service will allow redirection to any URL.
- If a redirection URL is not specified, the server will write out the login
token and expiration so that you can verify them by hand using
curl.
Credentials
In order to test an authentication service, you need login credentials. I have created a test account with the following credentials:
- Username: testuser
- Password: password
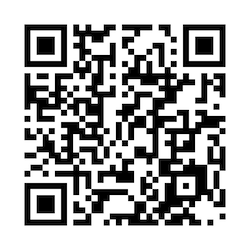
- MFA Code: (updates in seconds).
The MFA code is the type that Google
Authenticator or
Authy implements with one time codes which change
every 30 seconds. I have reproduced the algorithm in javascript to provide the
MFA code above, but you can use Google Authenticator or Authy if you wish by
manually providing the token: SF4TC2F7VRYMBQV5 or scanning the QR code below
with your app:
Using AuthHub
In order to use AuthHub you will have to do the following steps:
- Direct a user to the AuthHub login with a link you craft.
- Receive a login token from the user via a browser redirect.
- Verify the token's authenticity.
- Revoke the token.
I have written a server in python 2.7 available on github which demonstrates how these occur in code. You can see the demonstration in action, which function as a tutorial, at https://authdemo.idolstarastronomer.com/, or get the code and run it yourself. Below is a detailed description of the protocol.
Direct the user to AuthHub with a crafted link.
The AuthHub login page will have a URL of the form
https://prefix.authhub.net/htmllogin, where prefix is assigned when
you create a new AuthHub service. The demonstration service's login URL is
https://demo.authhub.net/htmllogin.
As part of constructing the URL, you need to supply two query string parameters:
code- A CSRF code which you randomly generate. This should be verified when the user returns to your site, and therefore saved using a cookie-based state mechanism.redirect_uri- A Universal Resource Indicator (notice the i at the end) indicating where the user's browser should be directed when login is complete.
For example, if I generated a CSRF code of Z21P79H2HIEV7TT865 and wanted to
redirect the user back to http://localhost:8085/login after login, I would
craft the following login URL:
https://demo.authhub.net/htmllogin?code=Z21P79H2HIEV7TT865&redirect_uri=http%3A//localhost%3A8085/login
Keep in mind that you must use proper URL encoding on your query parameters. The user can now click on that link to begin the login process with AuthHub.
For testing purposes on the demonstration service specifically, you can click on the link https://demo.authhub.net/htmllogin without any code or redirect URI if you would like to manually follow along. This will print the token to the browser window on successful login.
Receive the login token from the user's browser
The user provides his or her credentials to the AuthHub site. Once the user has successfully authenticated he or she will be redirected to the redirect URL with some additional query parameters. The parameters are listed below.
code- The CSRF code which your server initially provided. This should be tested to see that it matches the one you sent.token- A token presumably generated by AuthHub. You must verify that this token is genuine by connecting to AuthHub directly.expires- An ISO 8601 formatted date and time at which the token automatically expires.
A sample of the URL would be something like
http://localhost:8085/login?token=7fddb7b6f099bd4436deda4516535fd9a7d7635e6a8b3ddb3413d4077758a0fc&expires=2015-10-20T20%3A57%3A06Z&code=Z21P79H2HIEV7TT865
In this case the token is
7fddb7b6f099bd4436deda4516535fd9a7d7635e6a8b3ddb3413d4077758a0fc which
expires on October 20, 2015 at 20:57:06 UTC, and the CSRF code is
Z21P79H2HIEV7TT865.
The first step is to parse the query parameters and assure that the code you received is the same as the one you sent for that user. I tend to use session state cookies to do this. Next you must verify the authenticity of the token by connecting directly to the AuthHub service.
Verify the token's authenticity
The token can be verified with a GET request to the URL
https://prefix.authhub.net/verify/token. To verify the token returned above with
the demonstration AuthHub server we would use the URL below.
https://demo.authhub.net/verify/7fddb7b6f099bd4436deda4516535fd9a7d7635e6a8b3ddb3413d4077758a0fc
The GET request must be made using the appropriate client certificate. Each AuthHub service has one or more signed certificates which can be used by clients to verify their authenticity. For the demonstration server you need to use the following certificate and key files:
- Certificate: authhub_demo_client.crt
- Key: authhub_demo_client.key
Typically
you should store your key on your server and keep it protected. Since this is
a demonstration server, the certificate and key are available to download.
Once you have downloaded both the files above, you can verify the token using the
following curl command.
curl --cert authhub_demo_client.crt \
    --key authhub_demo_client.key \
    https://demo.authhub.net/verify/7fddb7b6f099bd4436deda4516535fd9a7d7635e6a8b3ddb3413d4077758a0fc
On success, you should receive a JSON object such as:
{
    "username": "testuser",
    "valid": true
}
The valid member indicates that the token is valid, and the username
member contains the authenticated username. If the token is not valid, you
will receive the following response:
{
    "username": null,
    "valid": false
}
If there is an error, then an HTTP response code corresponding to an error is
returned, and a JSON object which has only an error member is returned. The
value of that member is a string describing the error that occurred. For
example, if you attempted to verify a token with no client certificate or the
wrong client certificate, the returned HTTP code would be 403, and the
response would be:
{
    "error": "Missing or invalid client certificate"
}
Revoke the token
It is good practice to revoke a token if it has been successfully verified.
This eliminates the possibility of a replay attack being used to obtain the
user's username. Revocation is performed by calling a URL of the form
https://prefix.authhub.net/revoke/token. For the token we received
above the revocation URL would be:
https://demo.authhub.net/revoke/7fddb7b6f099bd4436deda4516535fd9a7d7635e6a8b3ddb3413d4077758a0fc
Once again you need to use a client certificate and key to make this call. In curl, using the certificate and key provided above, we can make this call with the command:
curl --cert authhub_demo_client.crt \
    --key authhub_demo_client.key \
    https://demo.authhub.net/revoke/7fddb7b6f099bd4436deda4516535fd9a7d7635e6a8b3ddb3413d4077758a0fc
The call returns an empty body, and a 201 code. The 201 code is probably not the appropriate code, it indicates successful creation of an object, not deletion, but it is often returned on success with an empty body. The more appropriate code would likely be 204, however I do not see that used as often.
Conclusion
Once you have revoked the token, you are done with authentication. You may now use the authenticated username you received from the processes to authorize any operations required by that user for your web or mobile based application.